Installing a Gotek USB Floppy Emulator on a Yamaha QX-1 (using HxC firmware)
13 minute read Published 2016-07-10
Special thanks to Jim Atwood and Noz Celica and user "bjt" on vogons.org for their detailed online instructions. And thanks to Jean-François DEL NERO (Jeff) for amazing custom firmware at a cheap price.
PLEASE NOTE: The last time I revised this document was July 10th, 2016. I cannot guarantee the information below is still correct. Please read this with that in mind.
The Gotek firmware that is included with the machine is not compatible with the specific type of disk that the Yamaha QX-1 uses. That is why we must get custom firmware installed onto the device. Once you do so, you will have a QX-1 with an easy, modern USB backup system that runs silently (the old floppy drive was noisy). It's very much worth it! If you can solder and afford to invest about $70 and a few hours into your QX-1, you will be very happy with the results. Please have soldering equipment and a windows 7 or later PC.
I will start with the purchase list. It is important to get these items exactly. They are all available from Amazon.com as of this writing.
-
CablesOnline 36 inch Universal Floppy Drive Ribbon Cable for 3.5 or 5.25in Drives, (FF-002) Price: $11.98
-
3.5" to 5.25" Drive Bay Computer Case Adapter Mounting Bracket, Metal Body, Plastic Bezel for USB Hub/Floppy/Card Reader Price: $8.99 NOTE: IMPORTANT! This comes with the adapter. If you end up getting another 3.5” to 5.25” drive bay, make sure you also get the cable adapter, included or separately.
-
Yosoo Sfr1m44-u100k Updated Version USB Floppy Drive Emulator -Black Price: $31.99 NOTE: IMPORTANT! Make sure you get this exact version. There are several different versions out there, I have only tested this particular one.
-
HiLetgo 3.3v 5.5v Ft232rl Ftdi Usb to Ttl Serial Adapter Module for Arduino UNO NOTE: IMPORTANT! There are a lot of USB to TTL serial adapters out there, but this is the one I've tested with (and was recommended on the forums). I can only vouch for this one.
The above items all qualify for Amazon prime (except for the usb to ttl serial adapter), so you should get your items quickly and for about $58.43. This will of course change over time, but is accurate as of this writing.
The following items I didn't need to purchase, since I already had them lying around, but I will list them anyway to be complete. They are cheap and you can get them at the sparkfun link or at lots of places.
There is actually one more thing to purchase... the custom bootloader from HxC (the bootloader is needed to load the custom firmware). It will make more sense to simply wait until we are at that step, as it simply requires emailing Jeff to let him know what you want, then sending him 10 euros via paypal.
Ok, let's begin!
Once all your parts have arrived, you might be tempted to try to install everything properly, but we're not ready for that yet. First thing you want to do is solder the headers onto the proper connections on the gotek. And to do that you must take it apart. This will be pretty straightforward and just requires a screwdriver.
The following instructions on the serial adapter and connecting it to the Gotek are mainly pulled from https://www.vogons.org/viewtopic.php?f=46&t=43416 with a little bit of changes. All credit goes to the user bjt who submitted these instructions.
Here is what the unit will look like with the top off (though yours will be black):
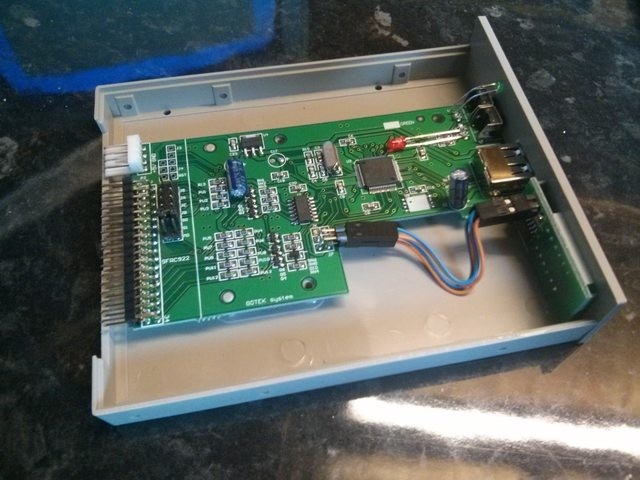
Image Source: User "bjt" on Vogons forum post.
Notice the empty through-holes for development. There are eight of them together. A row of 3 and a row of 5.
Take the main board completely out of the plastic enclosure. Now is the time to cut your breakable headers into a 3-part and a 5 part section, and solder them onto the board so their long ends stick up out on top, just like the already installed headers next to them.
Your board should have headers on it, like this: (minus the jumper and cable connected to it, we'll get to that later)
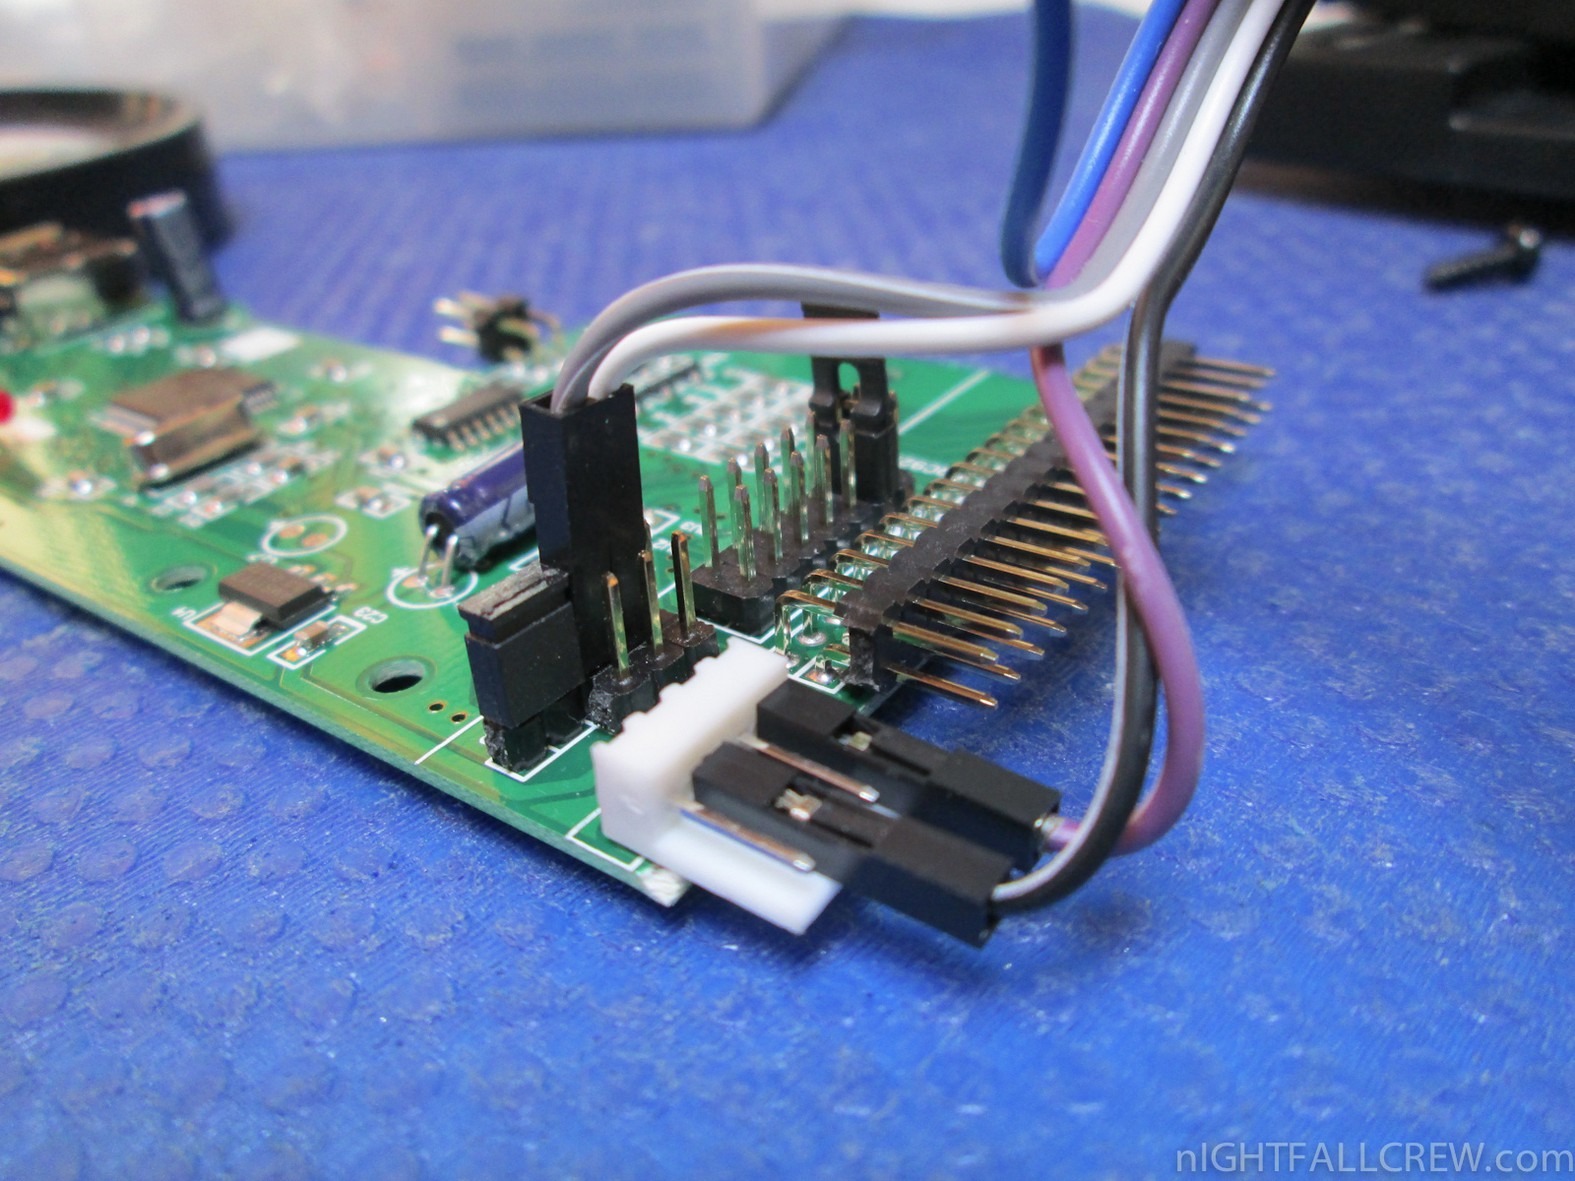
Image Source lost for this image. If you know it please contact me.
Bjt seems to just solder wires directly to the board, but by soldering headers you keep things cleaner and will be able to reuse your serial adapter for other projects.
Notice the jumper in the above picture? You should put that there now (connect the flashenable leads). It allows the Gotek to receive bootloader information. Your Gotek should come with about 3 or 4 jumpers.
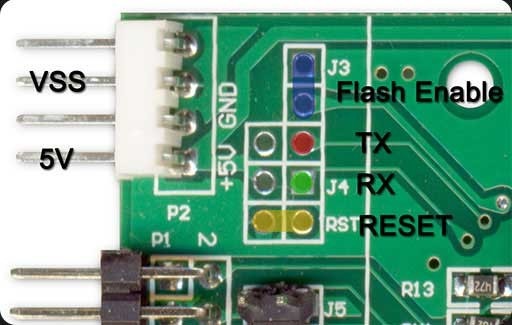
Image Source: Author "highpuff" on ikod.se article
Next, take out the serial adapter.
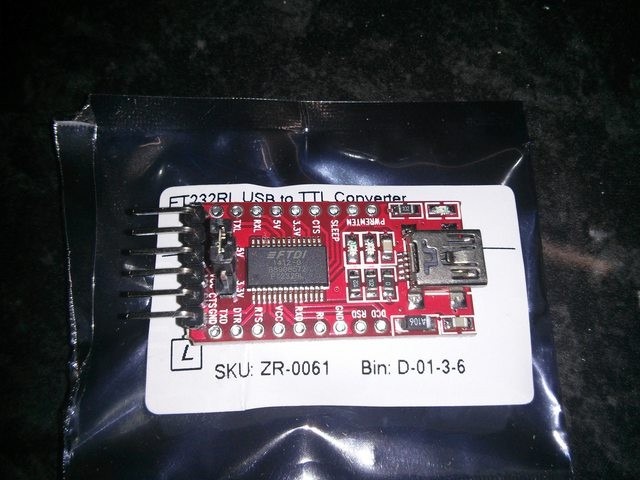
Image Source: User "bjt" on Vogons forum post.
I recommend soldering headers into here as well. I have them soldered to the underside. That way you could better use this adapter on a breadboard in a future project. Each side has about 9 through-holes, but you will only really be using four of them. Still, solder the headers on fully. It's just nicer.
Once this is done, you will want to connect your USB to TTL serial adapter to your Gotek. This is done like so:
- Converter 5V -> Gotek 5V
- Converter GND -> Gotek GND
- Converter TXD -> Gotek RX
- Converter RXD -> Gotek TX
The easiest way is to use the F/F jumper cables recommended earlier.
Plug in the serial adapter via a usb cable to your PC. The Gotek should power up via the USB. If it doesn't, you can try plugging it into your QX-1 via the power adapter that came with your 2.5 to 5.25 enclosure, then turning on the QX-1. But USB should be enough. Ok we are now at the point where we should contact Jeff and get the bootloader software purchased. Just send an email to hxc2001@hxc2001.com with “HxC bootloader installation server” as your subject, and ask something like the following: “Hi, I'm following the instructions to install your custom firmware onto a gotek floppy emulator, and I've reached the step where I am to ask you for access to the HxC bootloader installation server.”
He will ask for 10 euros via paypal, and once you follow his instructions, he will provide links to all the software you need. I will show you in the following instructions exactly what software we need and how to use it.
Unzip the file http://hxc2001.com/download/floppy_drive_emulator/STM32_SerialBridge.zip. This is will load the bootloader software onto the gotek. First plug in your serial connector to your PC via USB. After any driver installation messages are finished, run the secserialbridge executable. A window will pop up that looks like this:
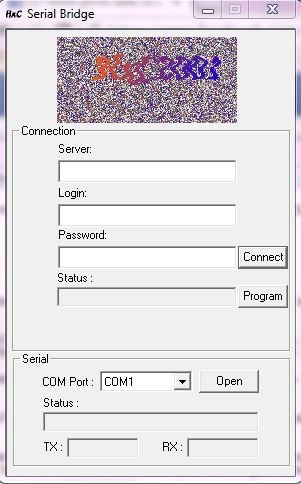
Enter in the server, login and password information given to you by Jeff, then click “connect”. Now this may be the trickiest part of the whole process. You need to select the COM port number the USB serial converter is connected to (probably the only one available, for me it was 3 or 4). Then you need to click “open”. When you do this, it will start sending and receiving data. For a while nothing will seem to happen. But eventually the following dialog should appear under status: “Device detected. (1 unit(s) left)”. If it has, press the “Program” button and wait as the bootloader is loaded up to your Gotek.
This was the only part of the process I really had some trouble with. I started out thinking that the TX RX I was seeing when I clicked “Open” was a part of the proccess, and I would wait many minutes to see if it would complete, but it never would. Really what I think was happening was the application was just waiting for me to click the “program” button and I simply didn't notice the “device detected” status when it appeared.
At any rate, good luck and many people have succeeded at this. I used a windows 10 64-bit machine to do this, and I imagine any windows 7 or later machine you are using will be fine.
When the bootloader has finished installing, it should display “Ldr” like so:
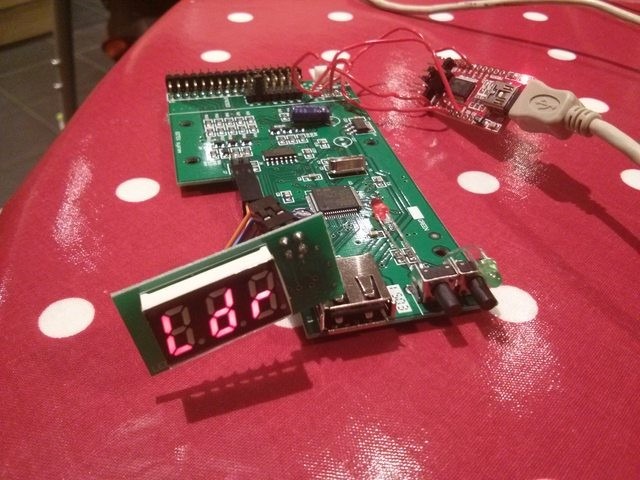
Image Source: User "bjt" on Vogons forum post.
Now that we have the bootloader installed on the Gotek, we need to install the custom firmware. Unplug the Gotek from the jumper cables connecting to the serial converter and put away the serial converter. Remove the jumper from the flash-enable leads.
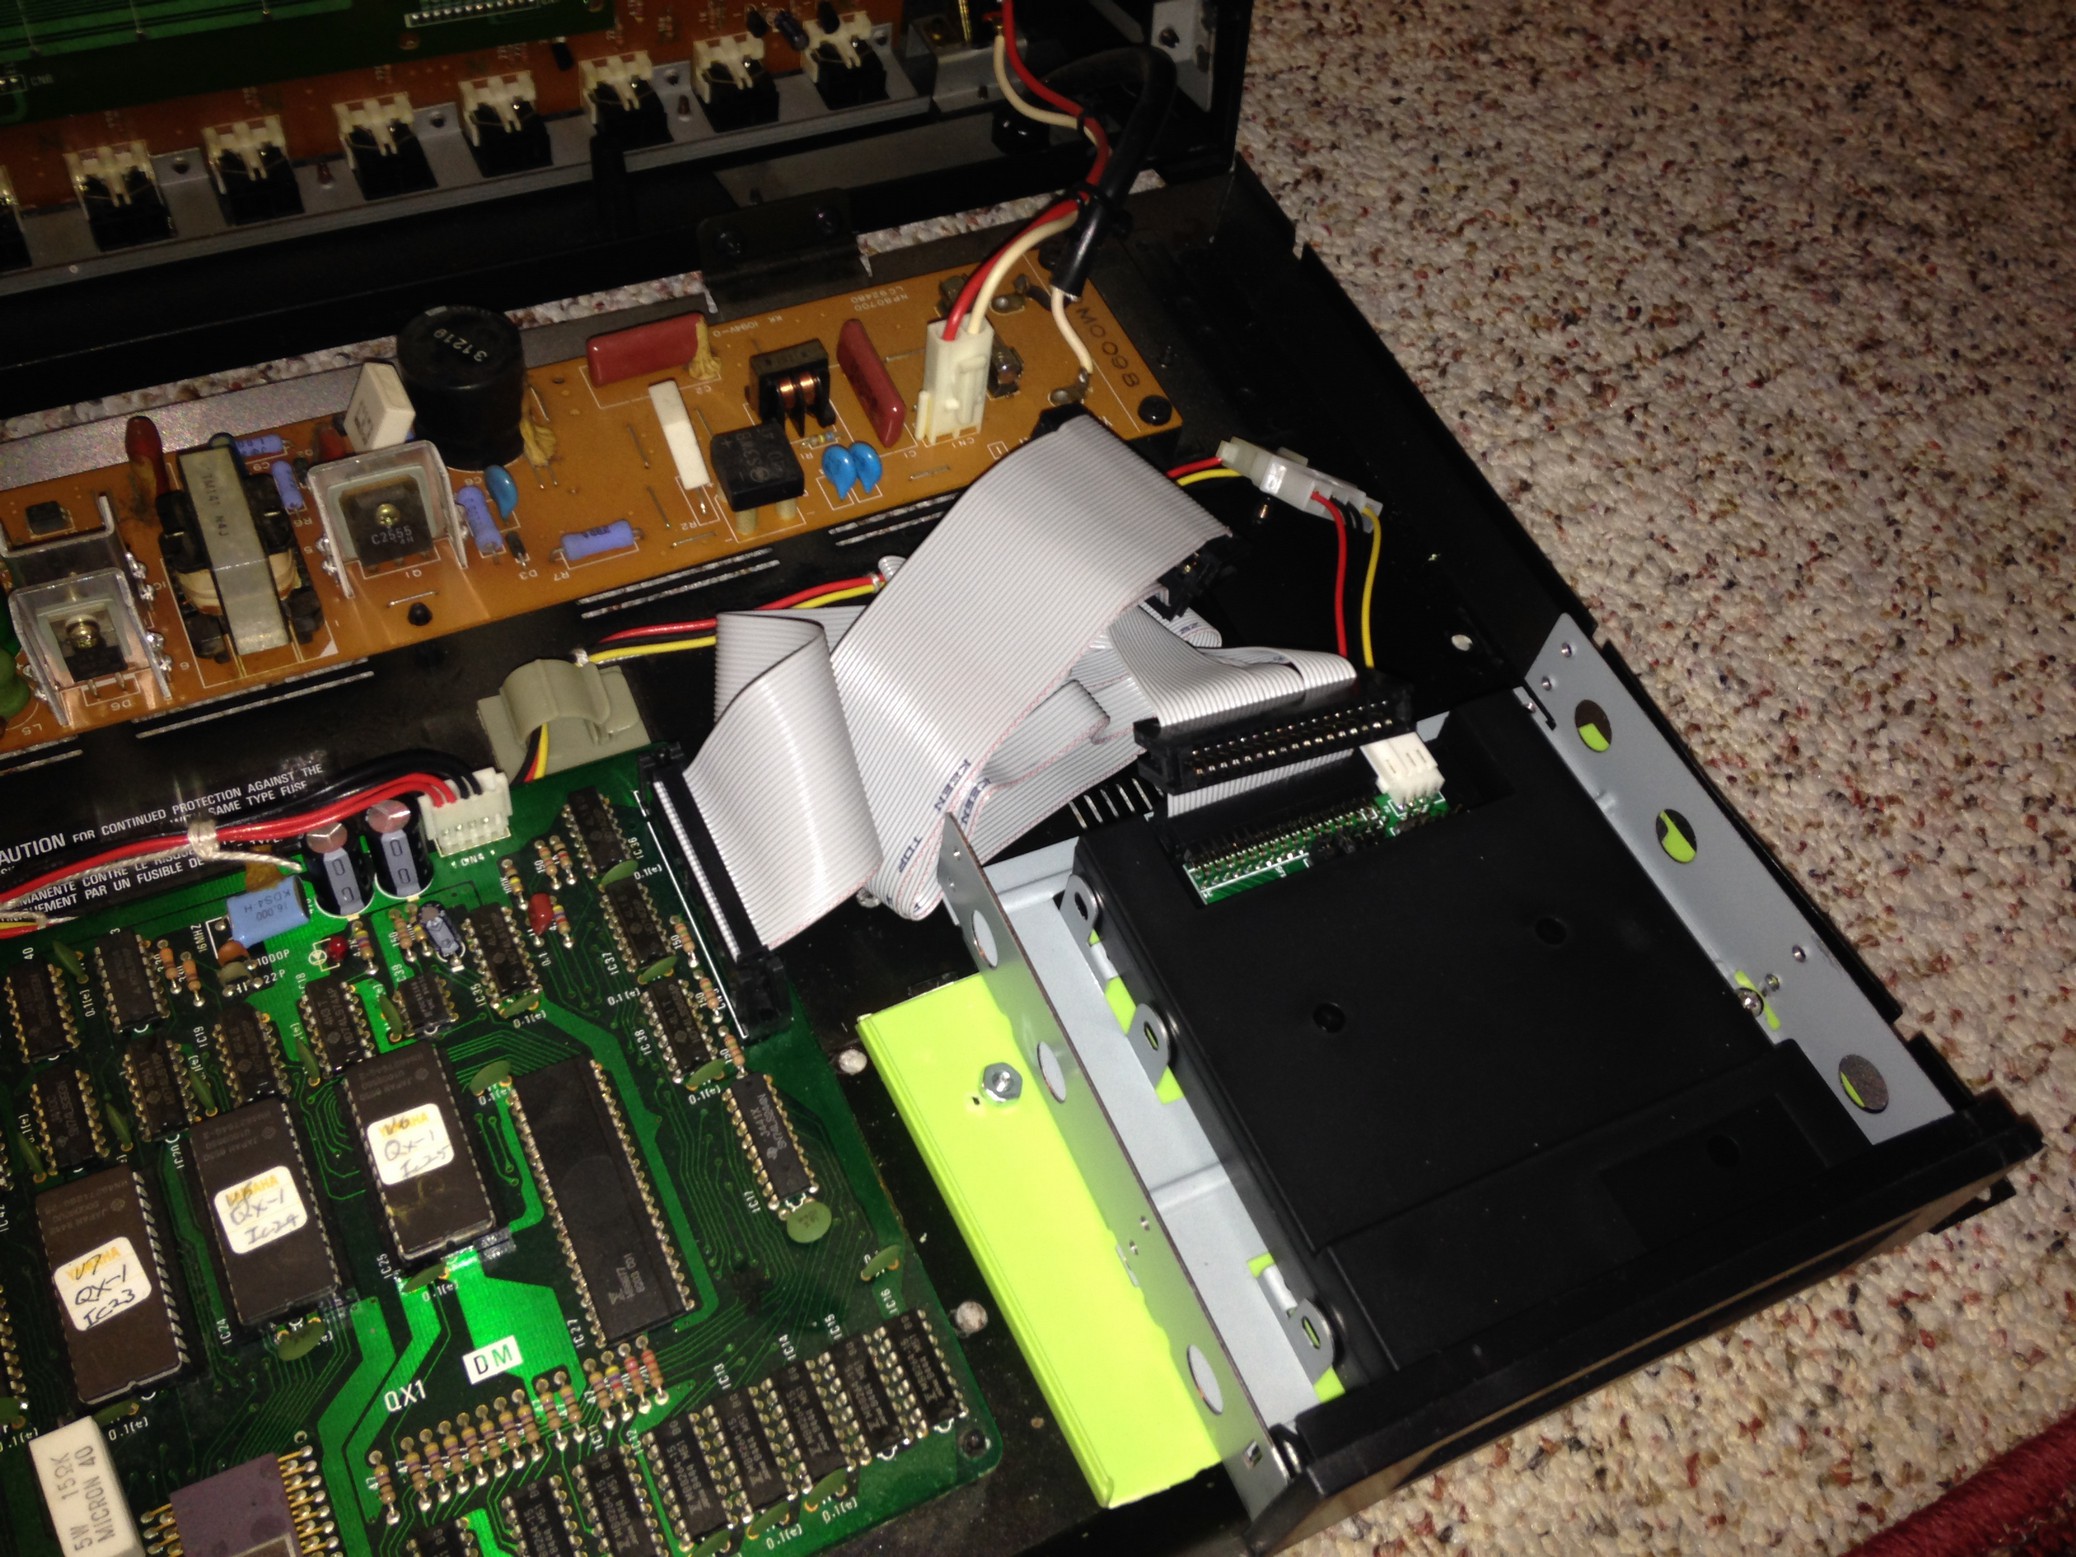
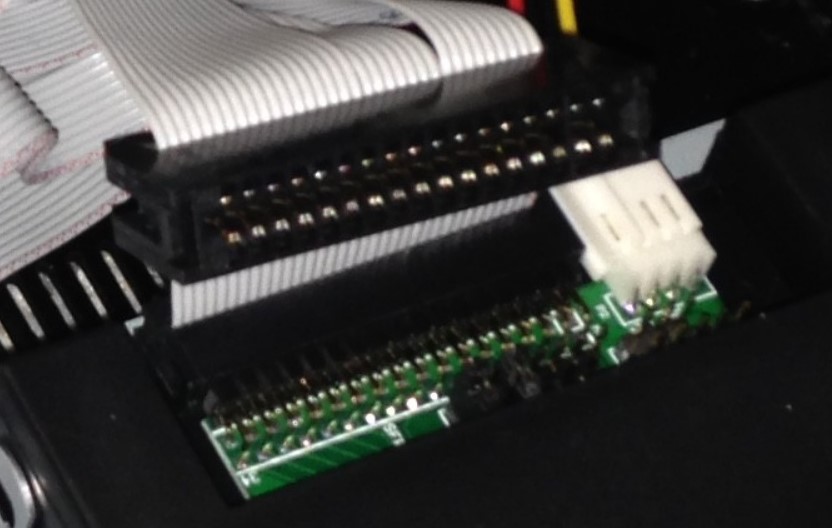
Now is a good time to properly connect the Gotek to the QX-1 itself. If you haven't already, connect the Gotek to the QX-1 via the power adapter cable that came with the 3.5 to 5.25 enclosure. Next, install the ribbon cable. You may notice a part of the ribbon that has a twist in it. That twist should be closes to the Gotek. One end of the ribbon cable connects to the main board of the QX-1 very close to where the drive bay is. It will be hard to miss. Just make sure that the red marked line of the ribbon is toward you. That same red line should be at the right as it connects to the Gotek. In the picture below you can see the Gotek properly connected. You shouldn't fit the enclosure in yet however, not until we are truly finished.
Next we are going to load the firmware onto a USB drive. This part is easy. First, format your USB pen drive in Fat32. Now unzip the file HXCFEUSB_HFE_firmware.zip. Go inside the folder called “Config_Files”. Now go inside “Indexed Mode” (Out of the three firmware versions, this is the one we want). Now copy the file HXCSDFE.CFG into your USB pen drive.
Once you are done with this, you can unplug your USB pen drive from your PC and plug it into the Gotek. But before you turn on the QX-1, make sure two jumpers are set, just like in the picture below:
Don't ask me why those two jumper positions are necessary. It was trial an error to figure out. I realize the photo isn't perfect, so here is an illustration:
Image Source lost for this image. If you know it please contact me.
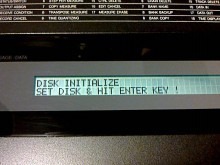
Now you should turn on the QX-1.
You should see the display look like it's loading something. And in a few minutes it will be done. Once finished, it will display “HxC” like so:
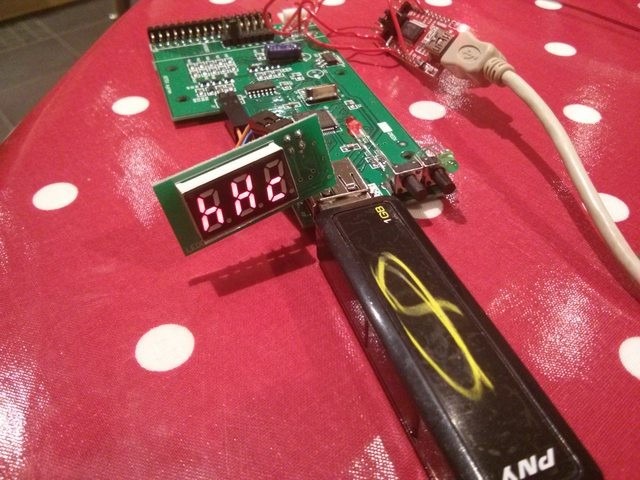
Image Source: User "bjt" on Vogons forum post.
Once this has been done, the hard part is pretty much done. I have provided on my web site the exact files you should put on a USB pen drive in order to start using the QX-1 with the floppy emulator. The files are here: http://rowlandrose.com/files/gotek_usb_floppy_files_and_config_for_qx1.zip Please unzip this file and copy it's contents into the root of a freshly formatted (Fat32) USB pen drive. Once done, your USB pen drive will have the proper config file to make it work, and ten blank virtual discs for the QX-1 to use.
Turn off the QX-1, put in the new USB pen drive you will be using for floppy reading and writing, and turn the QX-1 back on. You will get a message from the QX-1 asking to format the disc. Simply follow the instructions. The QX-1 will take a few minutes to format the blank virtual floppy, but once it's done, it will ask you to give the disk an ID. After finishing that, you will enter the main screen.
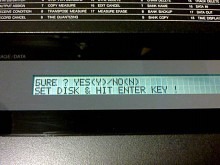
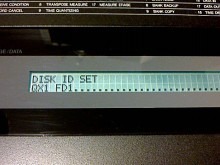
Images Source: User "Noz Celica" on this post on ameblo.jp.
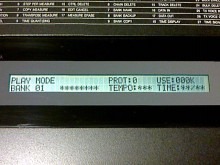
Success! You now are the proud owner of a Yamaha QX-1 with a working USB floppy emulator upgrade. The QX-1 is now ready to live on in the modern studio.
At this point you'll want to properly install the Gotek into the 3.5 to 5.25 enclosure. This should be straight forward with the screws provided. It's up to you how you want to install the enclosure into the QX-1. Unfortunately there is no easy predefined spot to screw it in. In an above picture you can see my example, where I used a bit of hard plastic for the enclosure to sit upon, with the enclosure screwed into the plastic and the plastic screwed into the QX-1. It works for me and it's snug and doesn't wiggle. But I'm sure there's many ways to do it, and probably some more proper than mine.
I have written these instructions to the best of my ability, but I fully concede that I could have missed something or made an error. If this is the case, please contact me. Thanks and good luck!